For my October “Sarah Makes” post, I struggled all month with what to write about. I’ve been practicing several different crochet techniques lately and couldn’t decide which one I actually wanted to write about. I finally landed on finger crochet and here is my experience!
As usual, I was in the office one day and I decided to check out the in-office yarn stash. I didn’t know exactly what I was looking for but realized that finger crochet would probably be easier with a bulkier yarn. I found a skein that looked suitable and brought it back to my desk.
I looked up some tutorials and at first it was a little confusing. Obviously, finger crochet is the exact same as regular crochet except your finger is the hook. For some reason, my brain didn’t understand this concept and it took me awhile to “get it.”
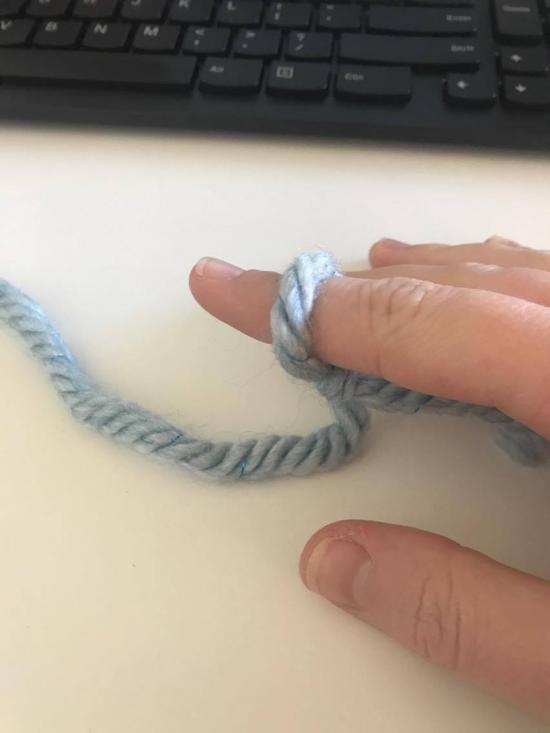
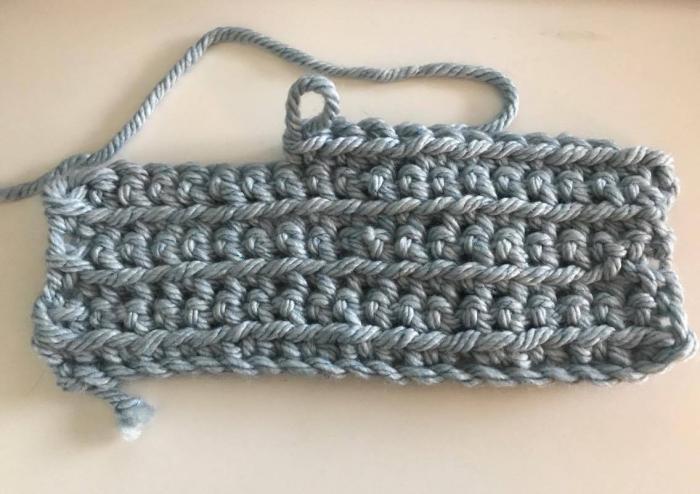
After watching a few more tutorials, I finally understood. I simply placed my right index finger (I’m right-handed) into the slip knot and began crocheting like I regularly do, just with my finger. As I kept going, it became easier and easier and I cranked out a whole swatch in a matter of minutes. Crochet is already pretty fast (and certainly faster than knitting), but the fact that I was using a bulky yarn also helped it work up quickly.

Interestingly enough, when I was finger crocheting, the swatches I made were perfectly straight and not bent or curved in any way. Something that I still somewhat struggle with when I’m crocheting regularly is that my work ends up curved and not straight. This is probably because I’m crocheting some of my stitches too tightly. When I finger crochet, however, this never seems to happen.

This technique is pretty easy and it’s fun too. If you’re looking for a kid-friendly craft or a great way to introduce kids to crocheting, this is as simple and fun as it gets.
So now that you know what it was like for me to learn finger crochet, here is the step by step tutorial I came up with, as well as some pictures to help you:
-
Use a thick yarn (bulky or super bulky - it makes it easier to see what you’re doing)
-
Make a slip knot
-
Instead of inserting your hook in the knot, use your finger
-
Yarn over your finger and pull through the first loop
-
Make 13 chain stitches and turn your work
-
Start in second chain from your finger and and do sc stitches to the end of the row (12 stitches)
-
Chain 1 and then turn
-
Start in first chain from your finger and do sc stitches to the end of the row
-
Crochet however many rows you want. I always suggest that when practicing a new technique, you start in swatches rather than attempting to create a finished project
Once you've got your swatch going, keep practicing and try some different stitches (double crochet, treble crochet, etc.). After you feel comfortable finger crocheting, you can try making an actual project; there are many patterns out there for anything from blankets to scarves to rugs!
